Author: Vince

4k Hackintosh with Raedeo 560

As of OS 10.12.6+ AMD graphics cards work out of the box with Hackintosh.  This means sleep and wake work reliably though there is a bit of a delay compared to my actual Mac.

The following is from Hackintosher.
https://hackintosher.com/guides/hackintosh-amd-graphics-cards-sierra-10-12-6/

Step 1. Mount EFI Partition
  1. Download Clover Configurator
  2. Open Clover Configurator
  3. Select Mount EFI under TOOLS
  4. Click Mount Partition for Install macOS….
  5. Click Open Partition (This is your EFI Folder)
Step 2. Verify EmuVariableUefi-64.efi

Some motherboards such as those by Gigabyte and ASROCK will require EmuVariableUefi-64.efi for NVRAM detection, without it you wont get hardware acceleration on your AMD card.

  • Verify file EmuVariableUefi-64.efi exits in location /Volumes/EFI/EFI/CLOVER/drivers64UEFI of your mounted partition.

If it’s not there add EmuVariableUefi-64.efi:

  1. Open Clover Configurator
  2. Mount your EFI Partition
  3. Open config.plist using Clover Configurator
  4. Click Install Drivers on left column of Clover Configurator
  5. Click EmuVariableUefi in bottom left box.
  6. Verify EmuVariableUefi-64.efi exists in /Volumes/EFI/EFI/Clover/Drivers64UEFI/
Step 3. Enabling AMD Cards
  1. Download latest release version of Lilu.kext
  2. Download latest release version of WhateverGreen.kext
  3. Unzip both RELEASE.zip downloads
  4. Copy Lilu.kext and WhateverGreen.kext from their respective RELEASE folders
  5. Place them in EFI/CLOVER/kexts/Other of your mounted EFI partition
Step 4. BIOS Settings
  1. Restart your computer
  2. Enter BIOS
  3. Verify that integrated graphics is disabled (if you can disable it)
  4. Verify that GPU is set to PEG/PCIe priority (This is super important as leaving it on Auto will cause performance issues)
  5. Save & Exit
  6. Boot your hackintosh

I need to make sure the Integrated Graphics is selected on boot:
https://www.tonymacx86.com/threads/radeon-560-must-use-igfx-to-boot-up.243319/

After that’s done….
This also means I finally get 4k @ 60Hz video as my Intel HD530 was not supported.
Make sure your using a display port connection and your ASUS MG24UMonitor is using Display Port 1.2.

Open Display Preferences

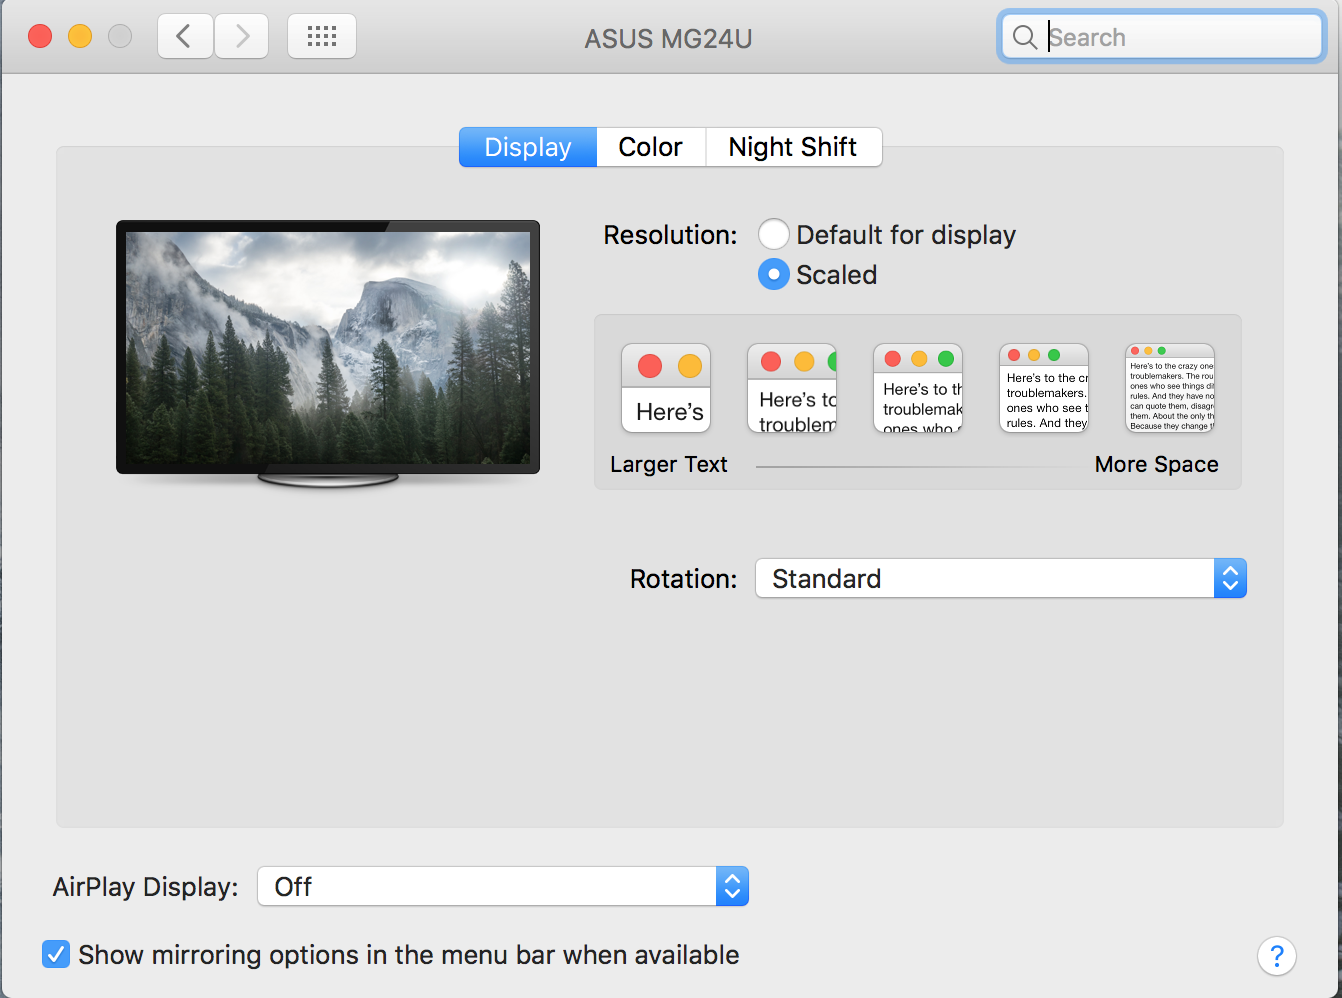
With my Windows Style keyboard press alt and click Scaled to get resolution options:

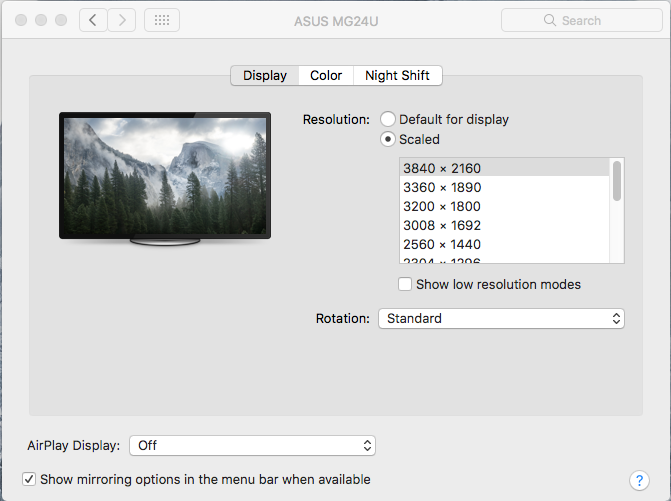
Select 3840 x 2160 and it’s all set.

Backing Up My Hackintosh

My Hackintosh is pretty brittle.  Anytime there’s an update I live in fear of it breaking my system.  So to that end I found it best to just clone the entire drive so that should something go wrong I can just put the entire clone of my drive back.  Since I dual boot I do this in linux, but you could also do it just booting up w/ linux on a usb drive.

To backup and restore my drive I use dd.  Here are the commands, obviously you’ll need to figure out which drive for your particular setup.

Restore:
sudo dd if=/dev/sde of=/dev/sda bs=1M conv=noerror,sync status=progress
Make backup:
sudo dd if=/dev/sda of=/dev/sde bs=1M conv=noerror,sync status=progress


Get a list of which disk is sdX to determine your drives.
sudo fdisk -l

On My Linux Box
sda – osx drive
sde – usb backup drive


Notes:
Cloning an entire hard disk
From physical disk /dev/sdX to physical disk /dev/sdY
# dd if=/dev/sdX of=/dev/sdY bs=64K conv=noerror,sync status=progress
This will clone the entire drive, including the MBR (and therefore bootloader), all partitions, UUIDs, and data.
https://wiki.archlinux.org/index.php/disk_cloning
https://www.tonymacx86.com/threads/backup-hackintosh-bootloader-with-dd-terminal.185484/
https://apple.stackexchange.com/questions/46253/what-is-the-best-way-to-clone-a-disk-between-two-macs?utm_medium=organic&utm_source=google_rich_qa&utm_campaign=google_rich_qa
> sudo dd if=/dev/rdisk0 of=/dev/rdisk2 bs=1m conv=noerror,sync
When dd finishes you may see an error like this:

dd: /dev/rdisk2: short write on character device
dd: /dev/rdisk2: Input/output error
3726+1 records in
3726+1 records out
500107862016 bytes transferred in 14584.393113 secs (34290619 bytes/sec)

That last error message is actually okay. The last block written was a short block because there wasn’t a full 1MB block to copy. No worries.
Now you’ve got a bit-wise perfect clone of your Macintosh HD drive. Reboot your system using the Macintosh HD drive and enjoy your clone!


Option:
If you want to compress the image to a file
https://superuser.com/questions/1097210/clone-only-space-in-use-from-hard-disk

To generate the image:
## dd probably needs sudo here.
dd if=/dev/sdb bs=32M | gzip -c > /foo/bar/my_image.dd.gz

To write the image back:
## dd probably needs sudo here.
gzip -cd < /foo/bar/my_image.dd.gz | dd of=/dev/sdb bs=32M

These commands might be built without dd, with gzip only. I used dd to ensure 32 MiB buffer.

Advantages:

  • The resulting file is non-sparse, it needs no special treatment.
  • The image size will be reduced even more if the files on your source disk are prone to compression.

Disadvantages:

  • It is hard to access the files within the compressed image without full decompression (some FUSE may be useful, although I’m not sure, never tried; consider a squashfs approach).

Mounting a Linux Software RAID 1 partition

Server died, have to recover data from a Linux Software RAID 1 drive.
Take the drive and connect it to another linux computer.  You won’t be able to mount it out of the box; if you try you’ll get an error that states mount: unknown filesystem type ‘linux_raid_member’.
install mdadm:
apt-get install mdadm

mdadm –examine /dev/sdd1

fdisk -l /dev/sdd
create a virtual md device with mdadm
sudo mdadm -A -R /dev/md9 /dev/sdd1
now you can mount the RAID 1 device
sudo mount /dev/md9 /mnt/old_hdd/
If you run into a device is busy error, stop mdadm
mdadm –stop /dev/md126
mdadm –stop /dev/md127
then try again

OSXFuse File Damaged

The following is copied word for word from apmouse‘s answer on stackexchange.com.

Under special circumstances, Mac OS X adds the extended attribute ‘com.apple.quarantine’ to a file which was e.g. downloaded from the internet. This can also happen to files within the BoxCryptor Folder. If an encrypted file has this extended attribute set, you receive the “is damaged” error message when trying to open the plaintext file in the BoxCryptor Volume.

x) Open Terminal (Applications -> Utilities)

y) Run the following command (substitute the path):

$ xattr -r -d com.apple.quarantine /path/to/encfs/mount/point

Source: http://apple.stackexchange.com/questions/129966/files-wrongly-considered-as-damaged-in-encfs-volume

Sometimes I will just apply this to a whole directory of my photos:
xattr -r -d com.apple.quarantine *